Saturday 31 May 2014

The half-term void, filled with second hand clothes.

Why hello there. S'up. Gooday. Or, as the 5 year old girls at my Rainbow unit say, gracias.

I haven't written in a while, I know. I could blame it on exam stress, or on having other, more important things to do, but let's be real, I just didn't write. But now I am! So get down with it, my friends.

Things that have happened this past while... I've finished all but one subject Re: GCSEs, and so have spent the past week on the couch, in me jimjams, watching harry potter films (record = three in a day) and ludicrous amounts of Gimore Girls. As you may have noticed, I have also rejigged my blog, to make it prettier, which I think I have achieved. What do you think?

The main thing that I have done this week, which involved leaving the house, was that me and my two goodest friends Jenni and Mabel went thrift shopping. Alack and alas, we didn't play macklemore whilst doing so, but there ya go.

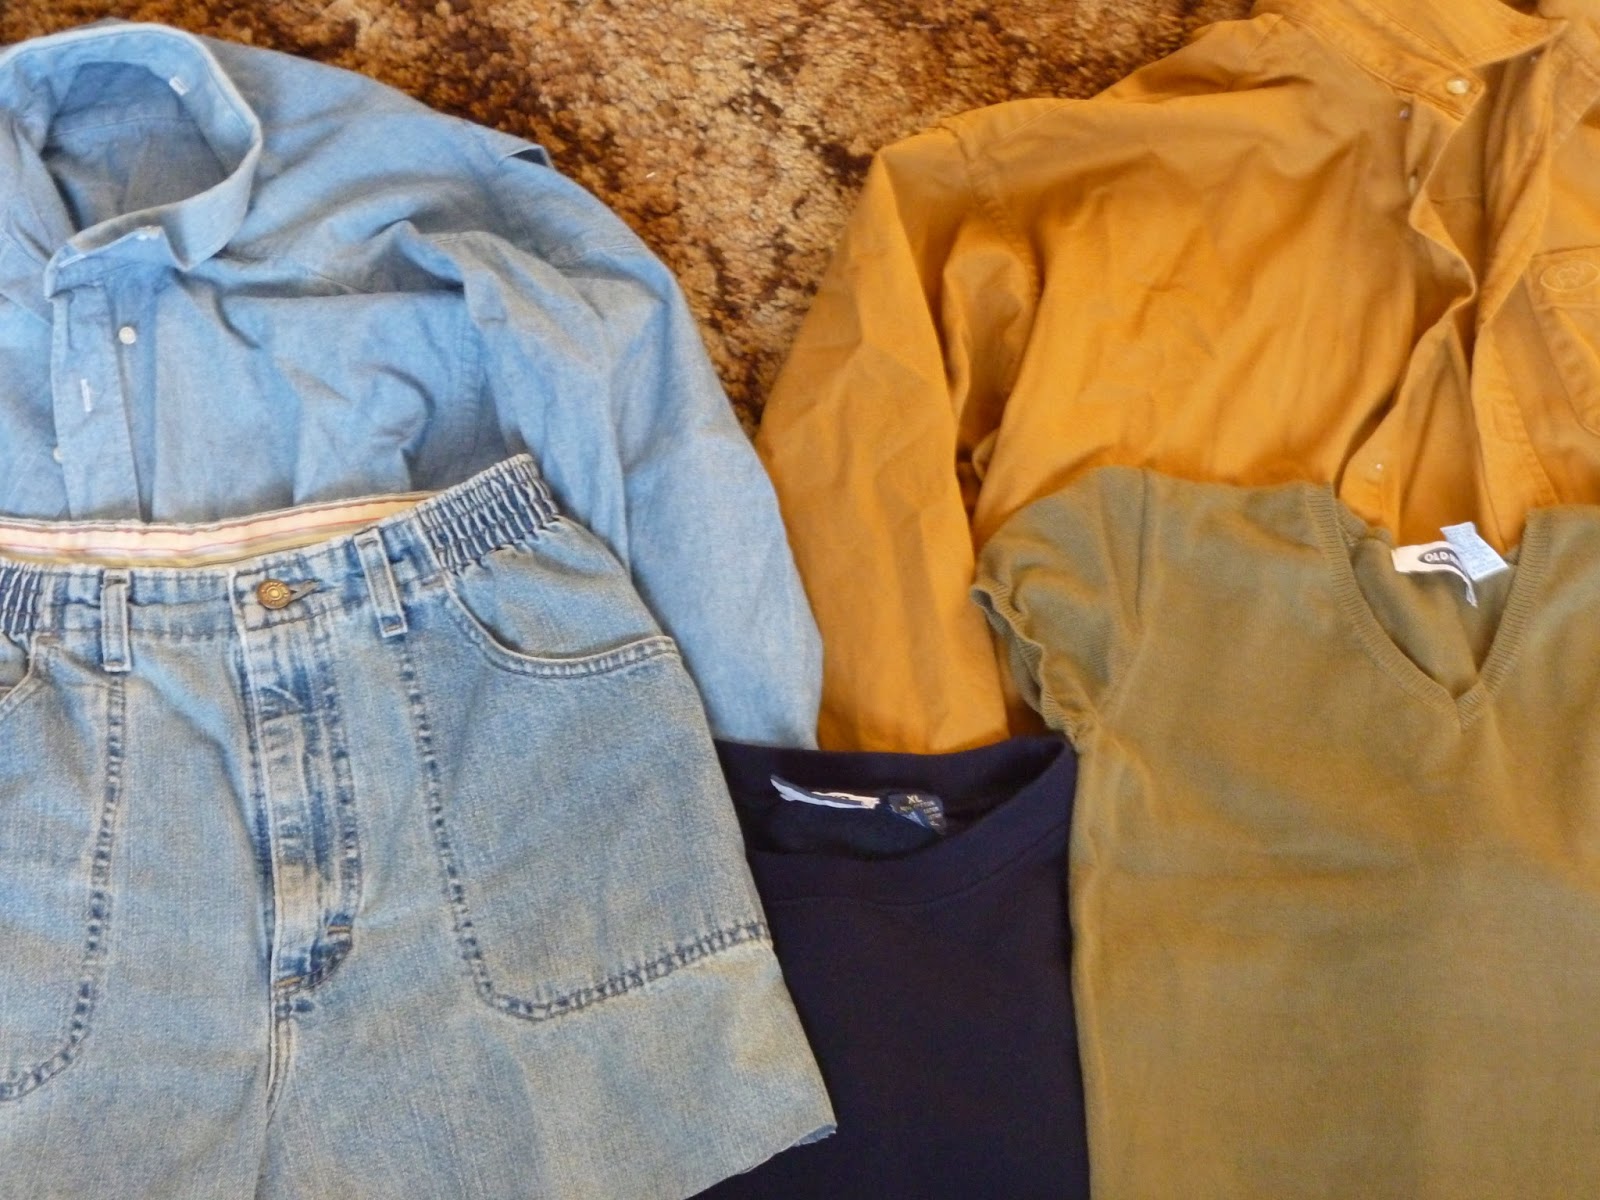
We went to the East End Thrift Shop, which is just off Mile End High Street and it was well cool. For anyone in NZ, it kinda reminded me of a scaled down version of savemart, but with a more indy crowd sifting the rails. There's also another, more catorgorised vintage shop attached to it, which is nicer/cleaner, but is a wee bit more expensive. But, less of the description, more of the what I got (finally, the suspense is over).
I bought a whole bunch, as I got a £10 bag and filled it to the brim. A denim shirt, a not denim shirt, another top of some kind, a sweatshirt I plan to bleach dye, a jersey, and jeans which I have just this day finished cutting off into shorts. 


But Georgia, where this Jersey be? Well, I'm wearing it now, so there ya go. (So damn comfy) 

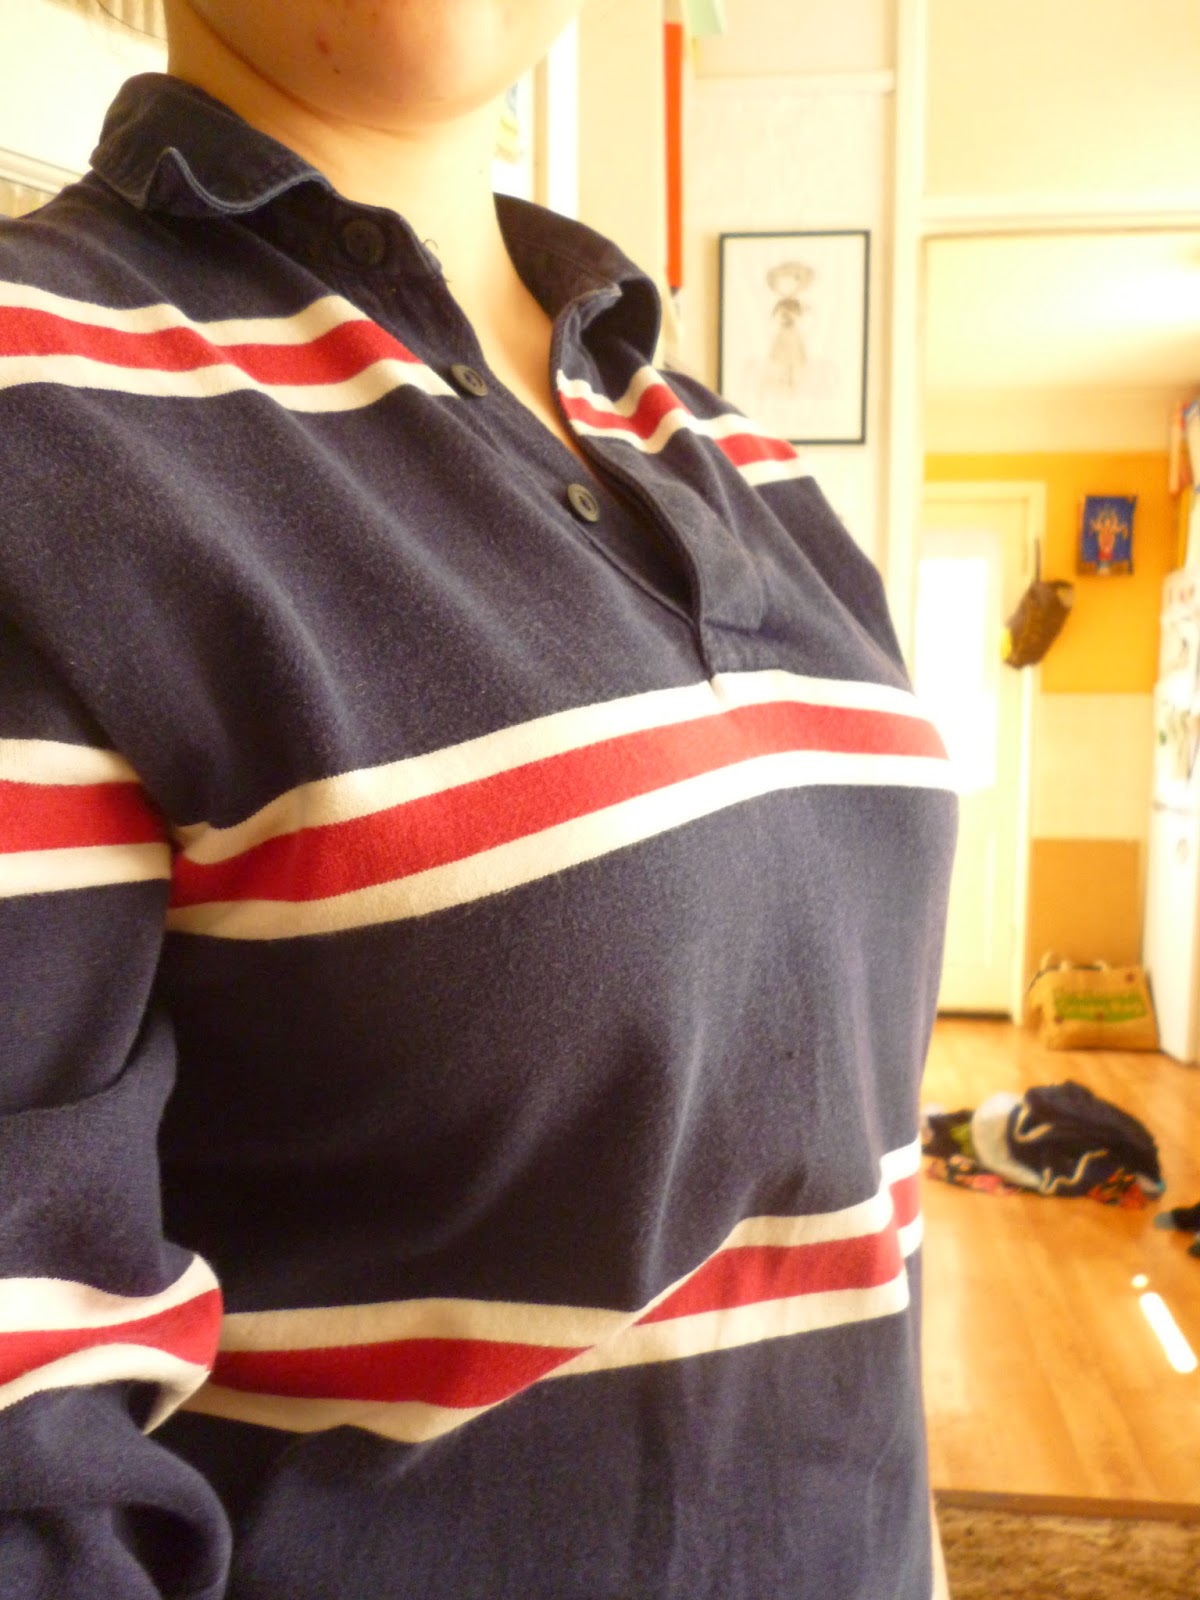
'Scuse the laundry n' dat...


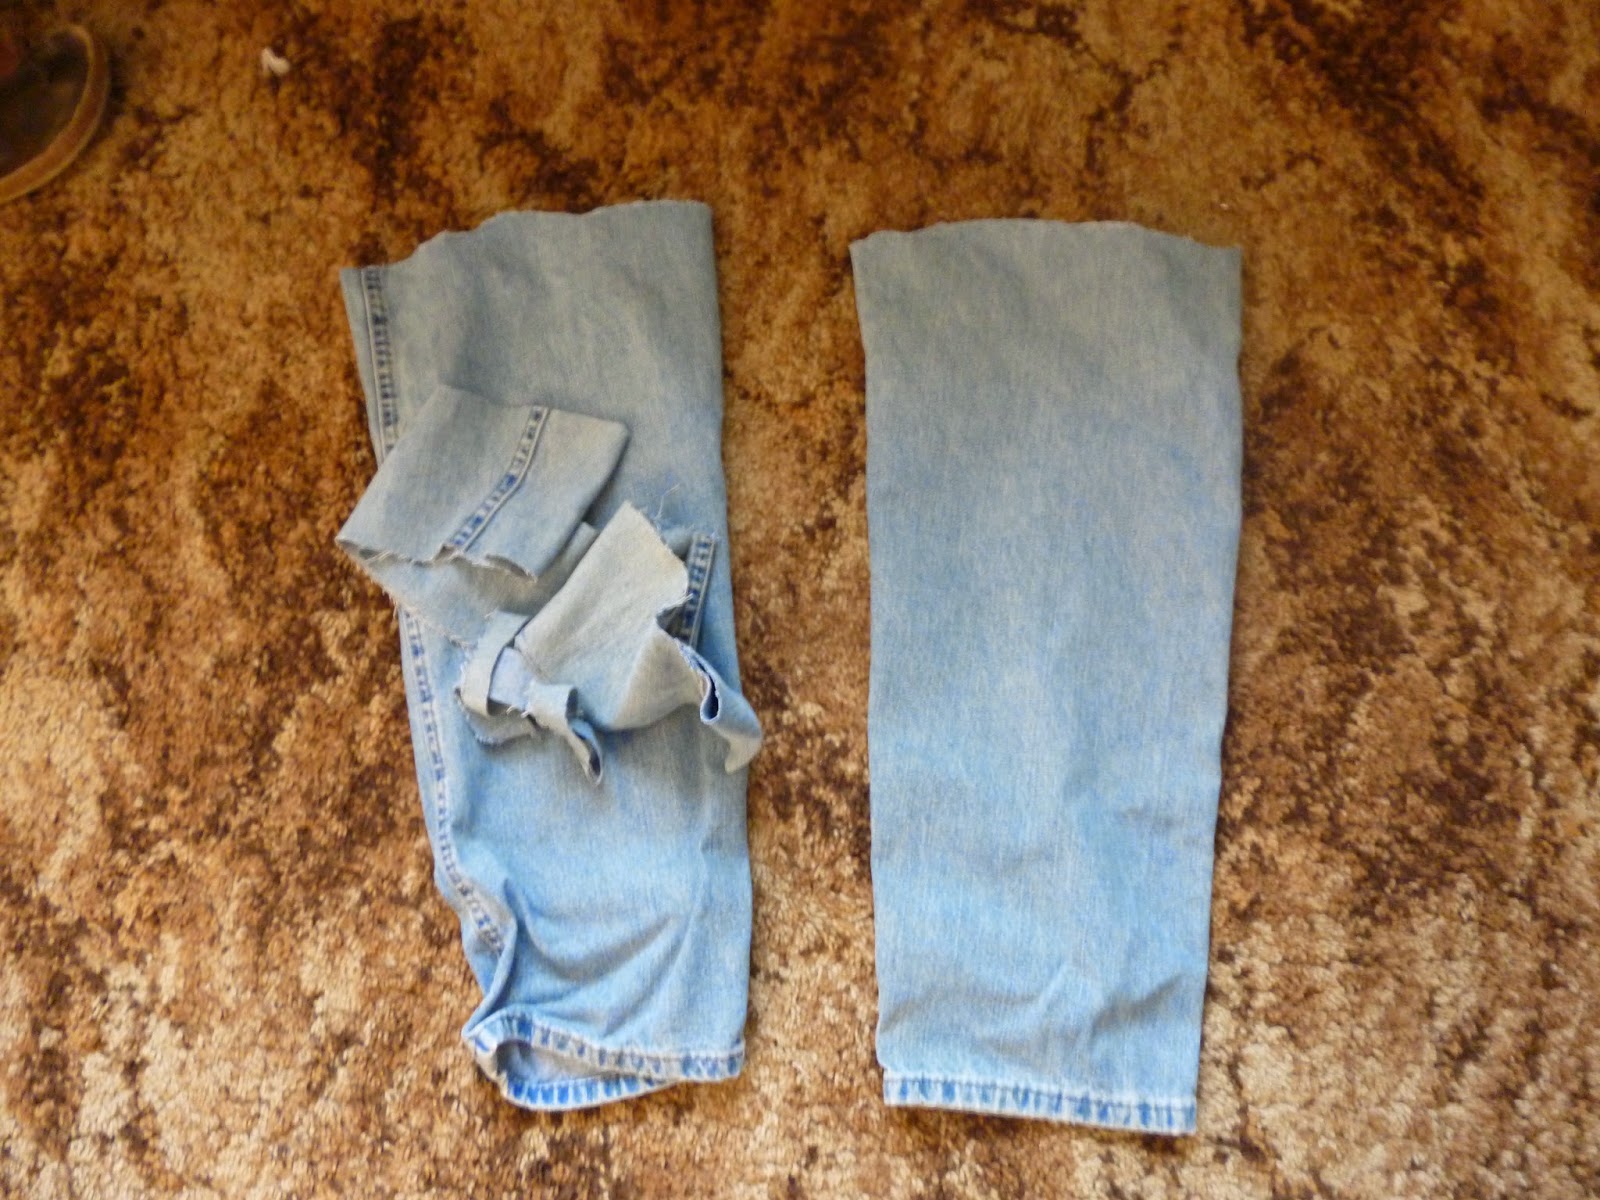
This is how much was cut off of the original jeans to make the hella beaut shorts.

Apart from this exhilirating experience (I left with a fine layer of clothesdirt on my hands - mmmmm)
that's it really. It feels kinda weird, this whole "not actually having a frame work for the 'post" thang, but it may make it easier for me to be bothered to post more :P 

Until next time, bonne nuit. (except wait lol, it's 11:04 in the morning)

Thursday 6 February 2014

Double crust pear pie - 'Cook More'


Helloo,

This is the blog post with the proper recipe for the pudding in my last video (link in the previous post) it’s basically a pear pie with a layer of marzipan goodness between it and the pastry. It’s from the Great British Bake Off ‘How to turn everyday bakes into Showstoppers’ book, which I got for Christmas a couple of years ago and haven’t used much, but I’m really glad that I did for this. 


Ingredients:
For the pastry
300g plain flour
Pinch of salt
3 tbsp sugar
175g butter, chilled and diced
1 large egg, beaten
1 tbsp ice-cold water

For the filling
225g marzipan, diced
100g butter, softened  and diced
2 tbsp plain flour
2 large eggs, beaten
4 large pears

Put flour, salt and sugar in a food processor and just ‘pulse’ a few times to mix them up. Then pop in the butter and process until it looks likes breadcrumbs. Add in the egg and water through the feed tube whilst the machine is running until the mix starts forming a soft dough, check it’s consistency before adding any extra water though, because it may not actually form a “ball” of dough; just make sure it’s not sticky and you can always compress it with your hands. Make the dough into a ball and wrap it in cling film before putting it into the fridge for 15 minutes. When rolling it out, cut off 2 fifths for the top and roll out the rest for the base, before putting it in a pie dish. Don’t cut off the excess pastry from the edges.

To make the filling, put marzipan and butter in a food processor and blend till smooth. The add the flour and eggs and process again until mixture is lovely and creamy. Spoon this into the pastry case and spread it out. Slice up the pears and lay them on top of the marzipan mix, to fill up the pie. Roll out the remaining 2 fifths of the pastry to just bigger than the circumference of the pie dish. Lightly brush the rim of the pastry case with cold water and then roll the pastry lid over a rolling pin and unroll over the pie. Press the edges together to seal the pie and cut off the excess pastry. You can decorate and finish the pie however you like, but make sure you put three slits in the top so it doesn’t explode in the oven. Put the pie dish on a pre-heated baking tray in the oven at 190°C for 40-45 minutes and leave to cool for 15 minutes before slicing.

Not to blow my own trumpet or anything, but this really did taste brilliant. Marzipan and pears were a match made in heaven, and it tastes petty grand cold, too.
  
Aand that’s it! See you next time, and let me know how you go if you try this :)

Love,

        Georgia

Monday 27 January 2014

Pork Ribs - 'Cook more'


Oi oi!

Welcome to the first blog post in… ahem… a while. This is a more detailed accompaniment to my January new years resolution video ‘Cook More’ (http://www.youtube.com/watch?v=Ihit3PW9ldU) . To illustrate me “cooking more” I filmed me making a bit of an effort with dinner… Pork ribs!


They were surprisingly easy really, but tasted great. This recipe comes from the Hairy Bikers’ family cook book (the Mum’s know best one) which is a lovely book that I have used plenty before.
Now, let’s get down to it.


Ingredients:
1 rack pork ribs
3 tomatoes (plum tomatoes work best)
1 finely chopped red onion
1 tsp Worcestershire sauce
1 clove garlic (roughly chopped)
1 tsp ground mustard
240 ml ketchup
2 tbsp soy sauce
55g sugar
1 tbsp cornflour, mixed with 3-4 tbsp water
Salt and pepper

Method:
Slice to separate the ribs, and put them in a pan of boiling water for 3-5 minutes, then leave to cool.

 
For marinade, mix together all remaining ingredients except the cornflour and water in a saucepan and bring to the boil. Then slowly mix in cornflour mixture until the marinade has thickened and pour it into a bowl/deep dish. Pop in the ribs, make sure they’re well covered in marinade and leave for 1-2 hours.

When you’re ready to cook, transfer ribs to a double foiled tray and cook in a preheated oven at 150° C for 1 hour. You can also barbeque them, but remember to wrap them in foil first. 


And that’s it! Finito! I also made potato and sweet potato wedges to go with my ribs which are dead simple, as well as salad, but you can do whatever you want to accompany them :)
I hope you like it, and let me know how you get on if you try this yourself! Stay tuned for my pudding recipe (pear and marzipan pie) and I shalt see thou anon. 

Love,
  Georgia

Tuesday 19 November 2013

Banana Bread


More baking! 

This time it’s banana bread; the second loaf I‘ve made this week… is that a good thing or a bad thing? I couldn’t say… :s

Anyway, it really does taste (and smell) great, and the walnuts add a nice extra texture.
Now that it’s coming into winter (Christmas soon!) I thought something sort of rustic and autumnal would be a nice, cosy idea. It’s especially nice when eaten warm.

Unfortunately I don’t have any pictures, because I didn’t have a camera to hand when I was baking. Sorry! But it’s really quite simple, and you’ll just have to believe that it’s a beautiful golden brown loaf cake that rises a fair amount :P 

Ingredients
125g butter/marg
¾ cup brown sugar
¼ cup or 4 tbsp golden syrup
2 cups flour
2 tsp baking powder
1 tsp ginger
1tsp cinnamon
2 eggs
2 ripe bananas, mashed
Handful of chopped walnuts (optional)

Method
Put butter, brown sugar and golden syrup in a saucepan and stir over a low heat until the butter has melted, then leave the mixture to cool for 5-10 minutes.

Sift all the dry ingredients into a bowl and make a well in the middle and then pour in the butter mixture, eggs, banana and walnuts. Mix until just combined and nice and smooth.

Pour the mix into a greased loaf tin (you’ll need a fairly large one) and pop into the oven for 45 minutes at 180⁰. You’ll know it’s done when you insert a butter knife and it comes out clean.
 Let it rest for five minutes before turning it out of the tin and onto a cooling rack. 


It should end up lovely and moist but pretty sturdy. It actually tastes really nice if you spread a slice lightly with cream cheese as well.

So, I hope you all have lots of good, autumnal fun trying this recipe out, and I’ll type to you later. Let me know how it goes if you make it yourselves. Bye!

Love,
  Georgia

Sunday 3 November 2013

Snickerdoodle cookies


I dun gone made some tastiness.

Haven’t written in a while have I? Ah well, to the biscuits.


This is the second time I’ve made this recipe (twice in one week… oops) and they’ve come out really well both times! (yay) 

I’ve been eyeing them up since I got the book the recipe is in; the hummingbird bakery cake days book. However, I had never tried them anywhere else (as in, made by any other fair hands except my own). But you’re just gonna have to trust me on this one guys… they be delish.

Another beauty of the snickerdoodle (we’ll get to baking in a mo, I promise) is that their ingredients are pretty simple as their only major, important flavouring is cinnamon, something most bakers (ok, pretty much ALL bakers) have in their cupboard anyways.

To the cookie creation! You’re going to need:

For the dough:
60g butter/marg
160g sugar
¼ tsp/1 drop vanilla essence
1 egg
240g plain flour
1 heaped tsp baking powder
1 tsp ground cinnamon (more/less depending on your taste buds)

For the coating:
1 ½ tbsp sugar
1 tbsp cinnamon


Cream together the butter, sugar and vanilla until light and fluffy. (If you have an electric whisk/mixer great, but I just used a fork) then add the egg and combine fully.

Sift together the remaining dry ingredients and mix them gradually in to the butter mixture until you’ve got a soft dough. (Make sure the cinnamon is evenly distributed, not too streaky)


Cover your mixing bowl with cling film and pop the dough in the fridge to rest. The book says 40 minutes, but I got impatient and that didn’t hinder me, so leaving them in there until the oven’s heated up and the trays are ready, etc. is fine.

Preheat the oven to 170⁰C and line two trays with grease proof paper. 

Mix together the sugar and cinnamon for the coating in a small bowl (like cereal bowl size is fine). 


Take the dough out of the fridge and break off small pieces (approx. a large teaspoonful), roll them into balls, roll them in the cinnamon-sugar mixture and pop them on the baking tray, no need to flatten them.  Allow a bit of space around each one for spreading whilst they cook.

Bake for about 12 minutes.


Once they’re out of the oven, let them cool for a bit on the parchment before putting them on a rack.
 

Look, mine look not dis-similar from the ones in the picture! Hurra!


And there you have it! Le snickerdoodle cookies. I’m sure I’ll be whipping them up again soon. Will you? 


The second time round, I added vanilla cream cheese icing and sandwiched some of them together, which tasted great however they completely stand alone as well. They would actually make a neat gift, wrapped in a box or cellophane; that is if you can keep from eating them all yourself… 


I hope you enjoyed this! Maybe I’ll write again next time I bake… who knows. I’m like a kitchen enigma! One minute I’m there, Imparting my culinary successes, the next I‘m gone; leaving only the virtual smell of warm biscuits (or muffins or cake or bread) behind me… and probably a line of crumbs…
Let me know how your snickerdoodles turn out, won’t you and I’ll see you never, but talk at you soon.

Love,
         Georgia

P.S. Has anyone got any idea why these biscuits have such a funny name?